Getting Started
Create your account, set up your organization, add locations and products, and take your first inventory count.
This guide walks you through everything you need to do when you first sign up for Happy Bar — from creating your account to completing your first inventory count.
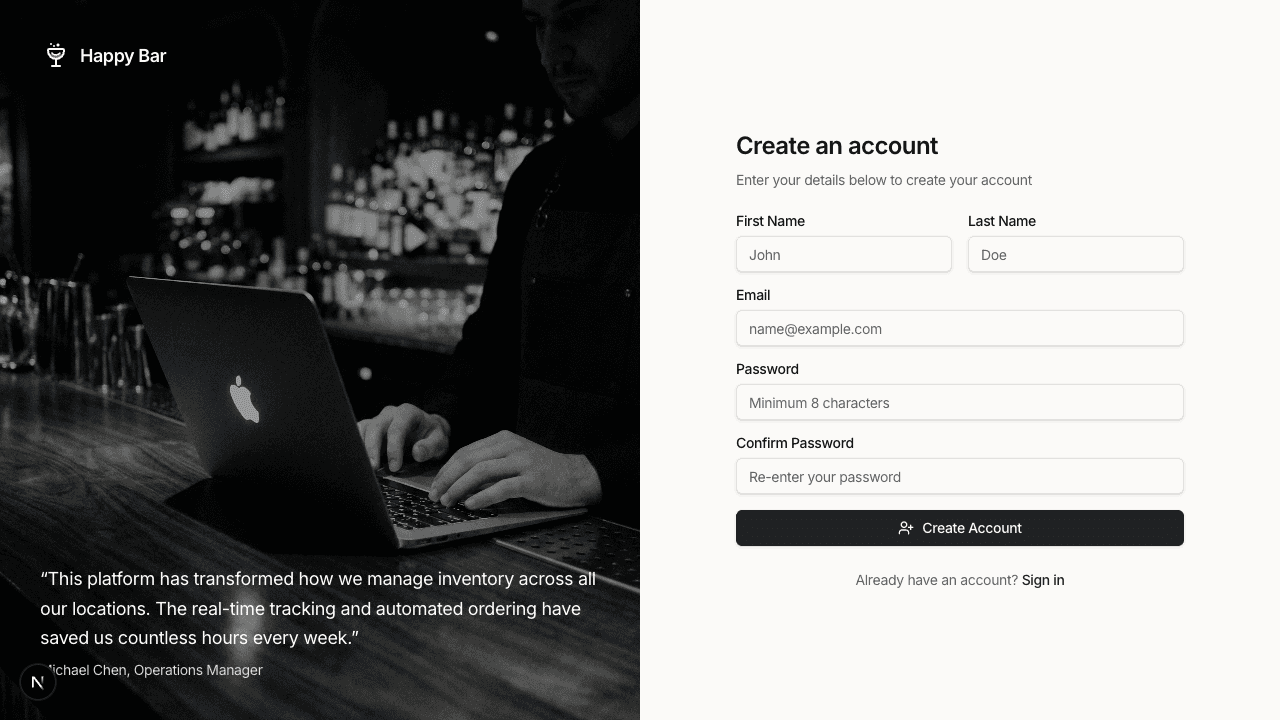
1. Create Your Account
Go to happybar.app/register and fill in:
- First Name and Last Name
- Email Address
- Password (must be at least 8 characters)
- Confirm Password
Click Create Account. You'll receive a verification email — click the link in the email to activate your account.
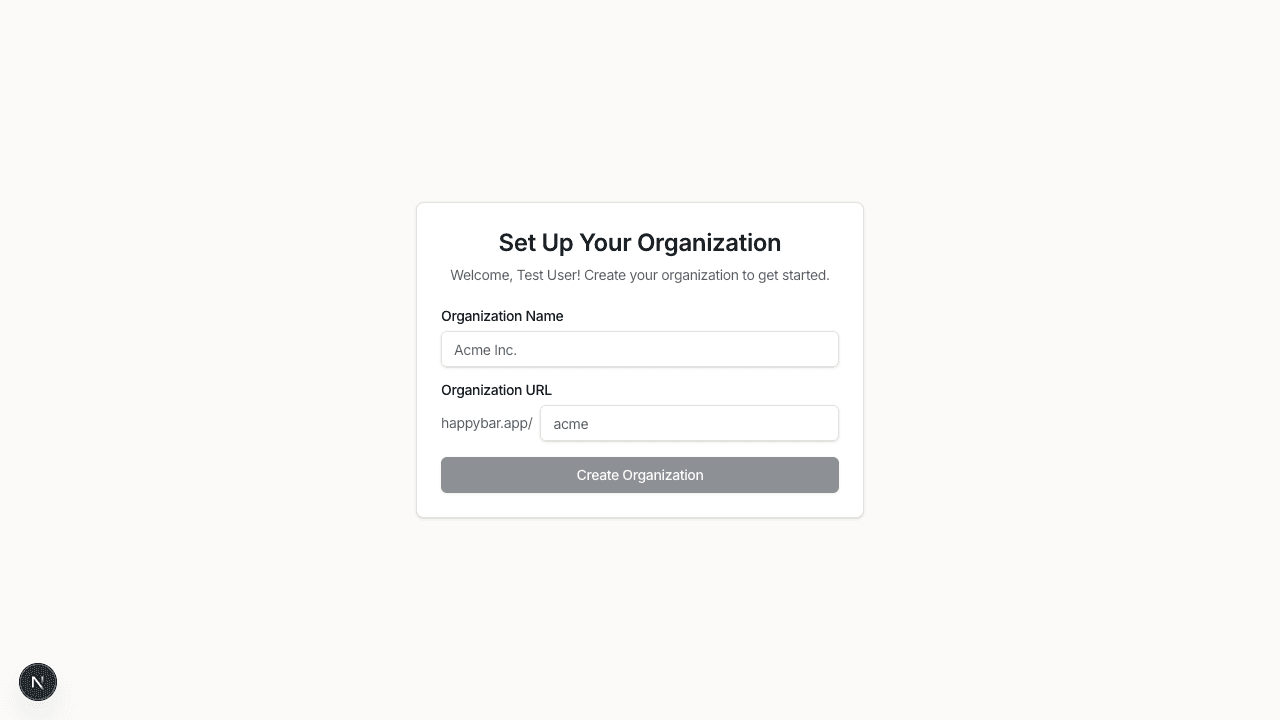
2. Set Up Your Organization
After verifying your email, you'll be prompted to create your organization.
- Organization Name — your business name (e.g., "The Happy Hour Lounge")
- Organization URL — a unique URL slug for your account, auto-generated from your name but editable
Click Create Organization to continue.
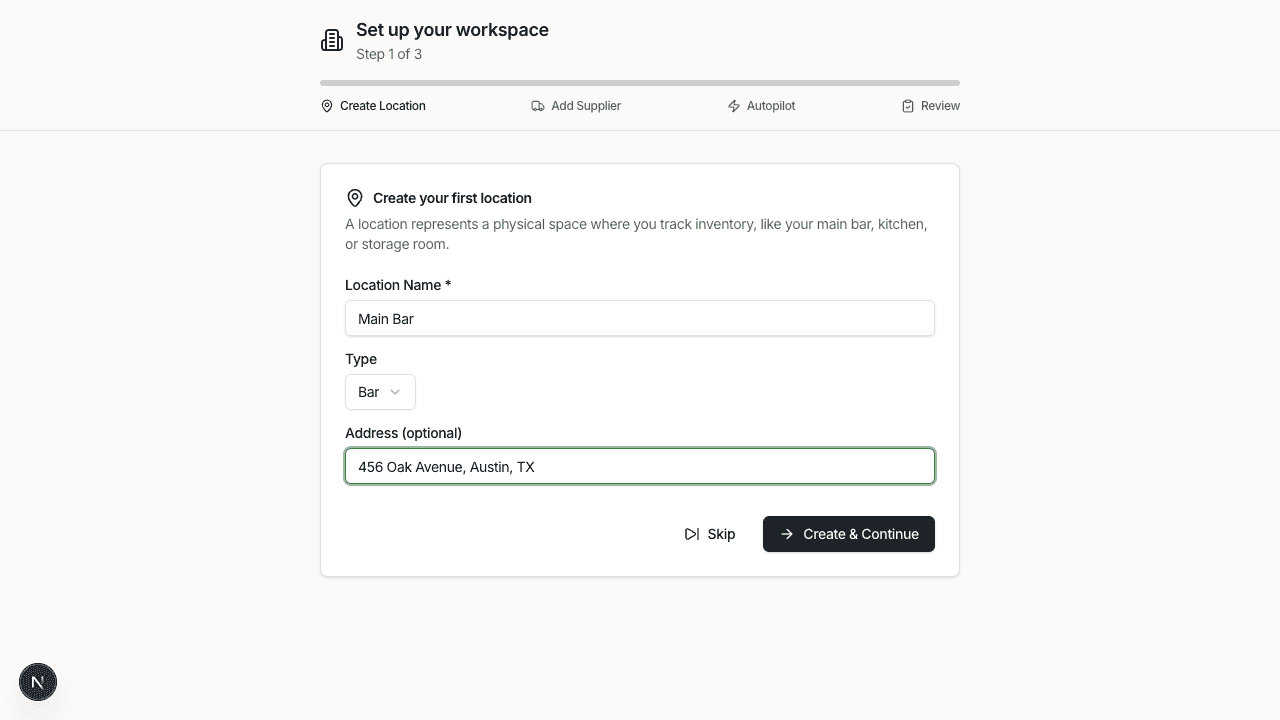
3. Onboarding Walkthrough
After creating your organization, you'll enter the onboarding walkthrough — a guided 4-step process.
Step 1: Create a Location
A location represents a physical place where you store and serve inventory (e.g., "Main Bar", "Downtown Location").
- Location Name — a descriptive name (required)
- Location Type — Bar, Kitchen, Storage, or Retail
- Address — optional
Click Add Location to save. You can add multiple locations during this step.
Step 2: Add a Supplier
Suppliers are the vendors you order products from.
- Supplier Name — the vendor name (required)
- Account Number — your account number with the supplier (optional)
- Order Cutoff Days — which days of the week you can place orders
- Order Cutoff Time — the latest time you can submit an order that day
- Delivery Days — which days the supplier typically delivers
You can add multiple suppliers or skip this step for now.

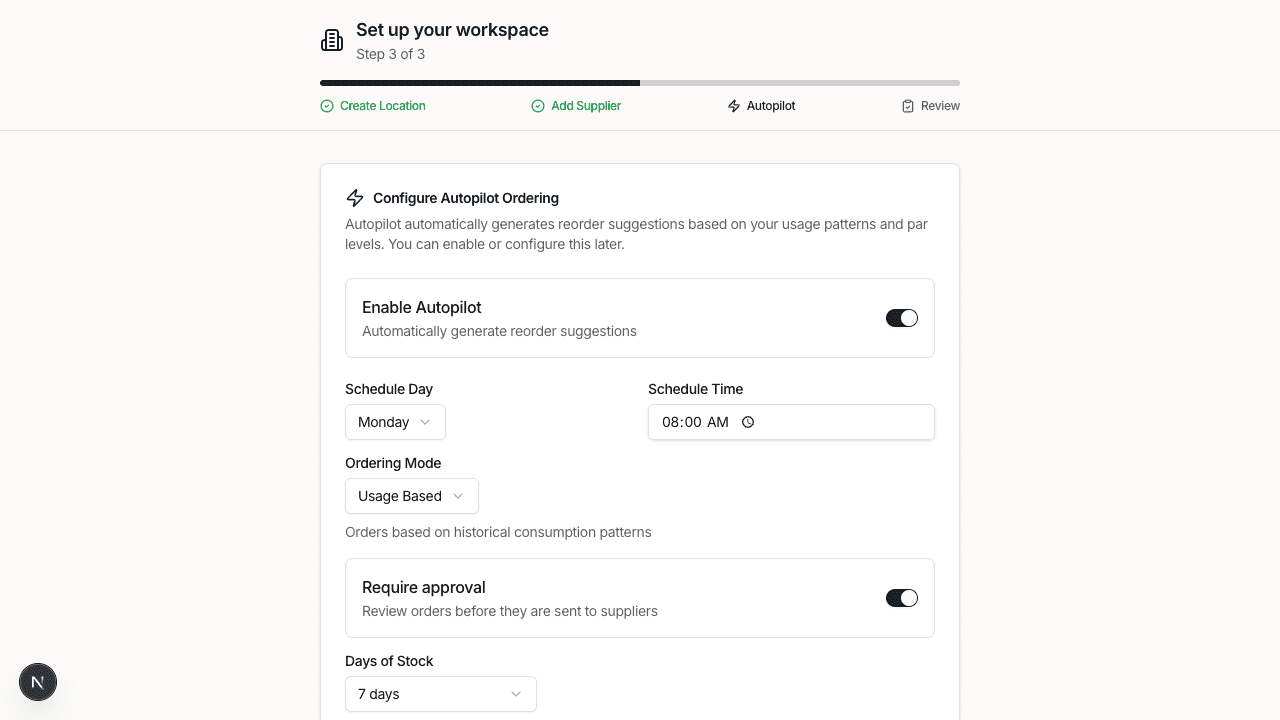
Step 3: Configure Autopilot Ordering
Autopilot automatically generates purchase orders based on your inventory levels. You can enable it now or set it up later in Settings.
If you enable Autopilot:
- Schedule Day — the day of the week orders are generated
- Schedule Time — when the system creates orders
- Ordering Mode — Usage Based (orders based on consumption history) or Par Level (orders to restore stock to par)
- Approval Required — whether you review orders before they're sent
- Days of Stock — how many days of inventory to order for (3, 5, 7, 14, or 21)
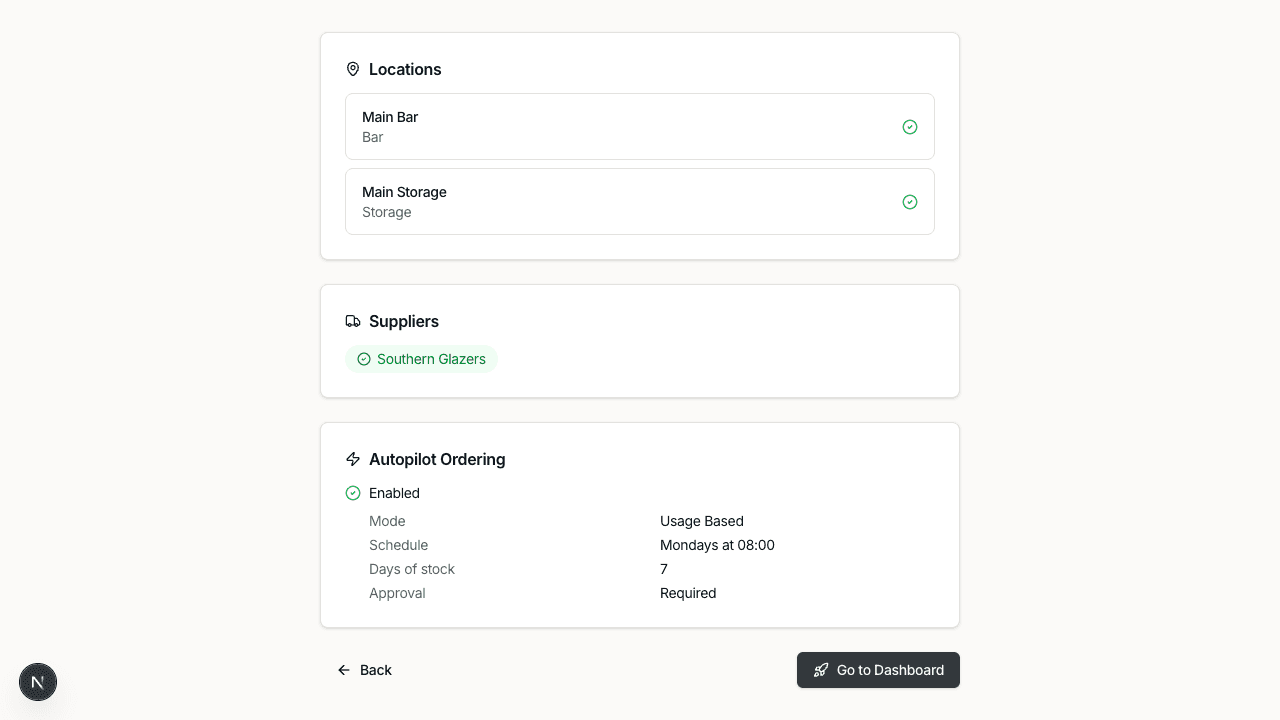
Step 4: Review
Review your configuration summary showing your locations, suppliers, and Autopilot settings. Use the Back button to make changes, or click Go to Dashboard to finish onboarding.
4. Add Products
Once you're on the dashboard, navigate to Products in the sidebar. You can add products in three ways:
Add a Single Product
Click Add Product and fill in the product details:
- Product Name, SKU, UPC
- Category (e.g., Spirits, Beer, Wine, Mixers)
- Unit Type and Container Type
- Cost per Unit, Cost per Case, Sell Price
- Alcohol Content (percentage)
- Image (optional)
Import from CSV
Click the dropdown arrow next to Add Product and select Import from CSV. Upload a spreadsheet with your product catalog. The importer will map your columns to Happy Bar fields.
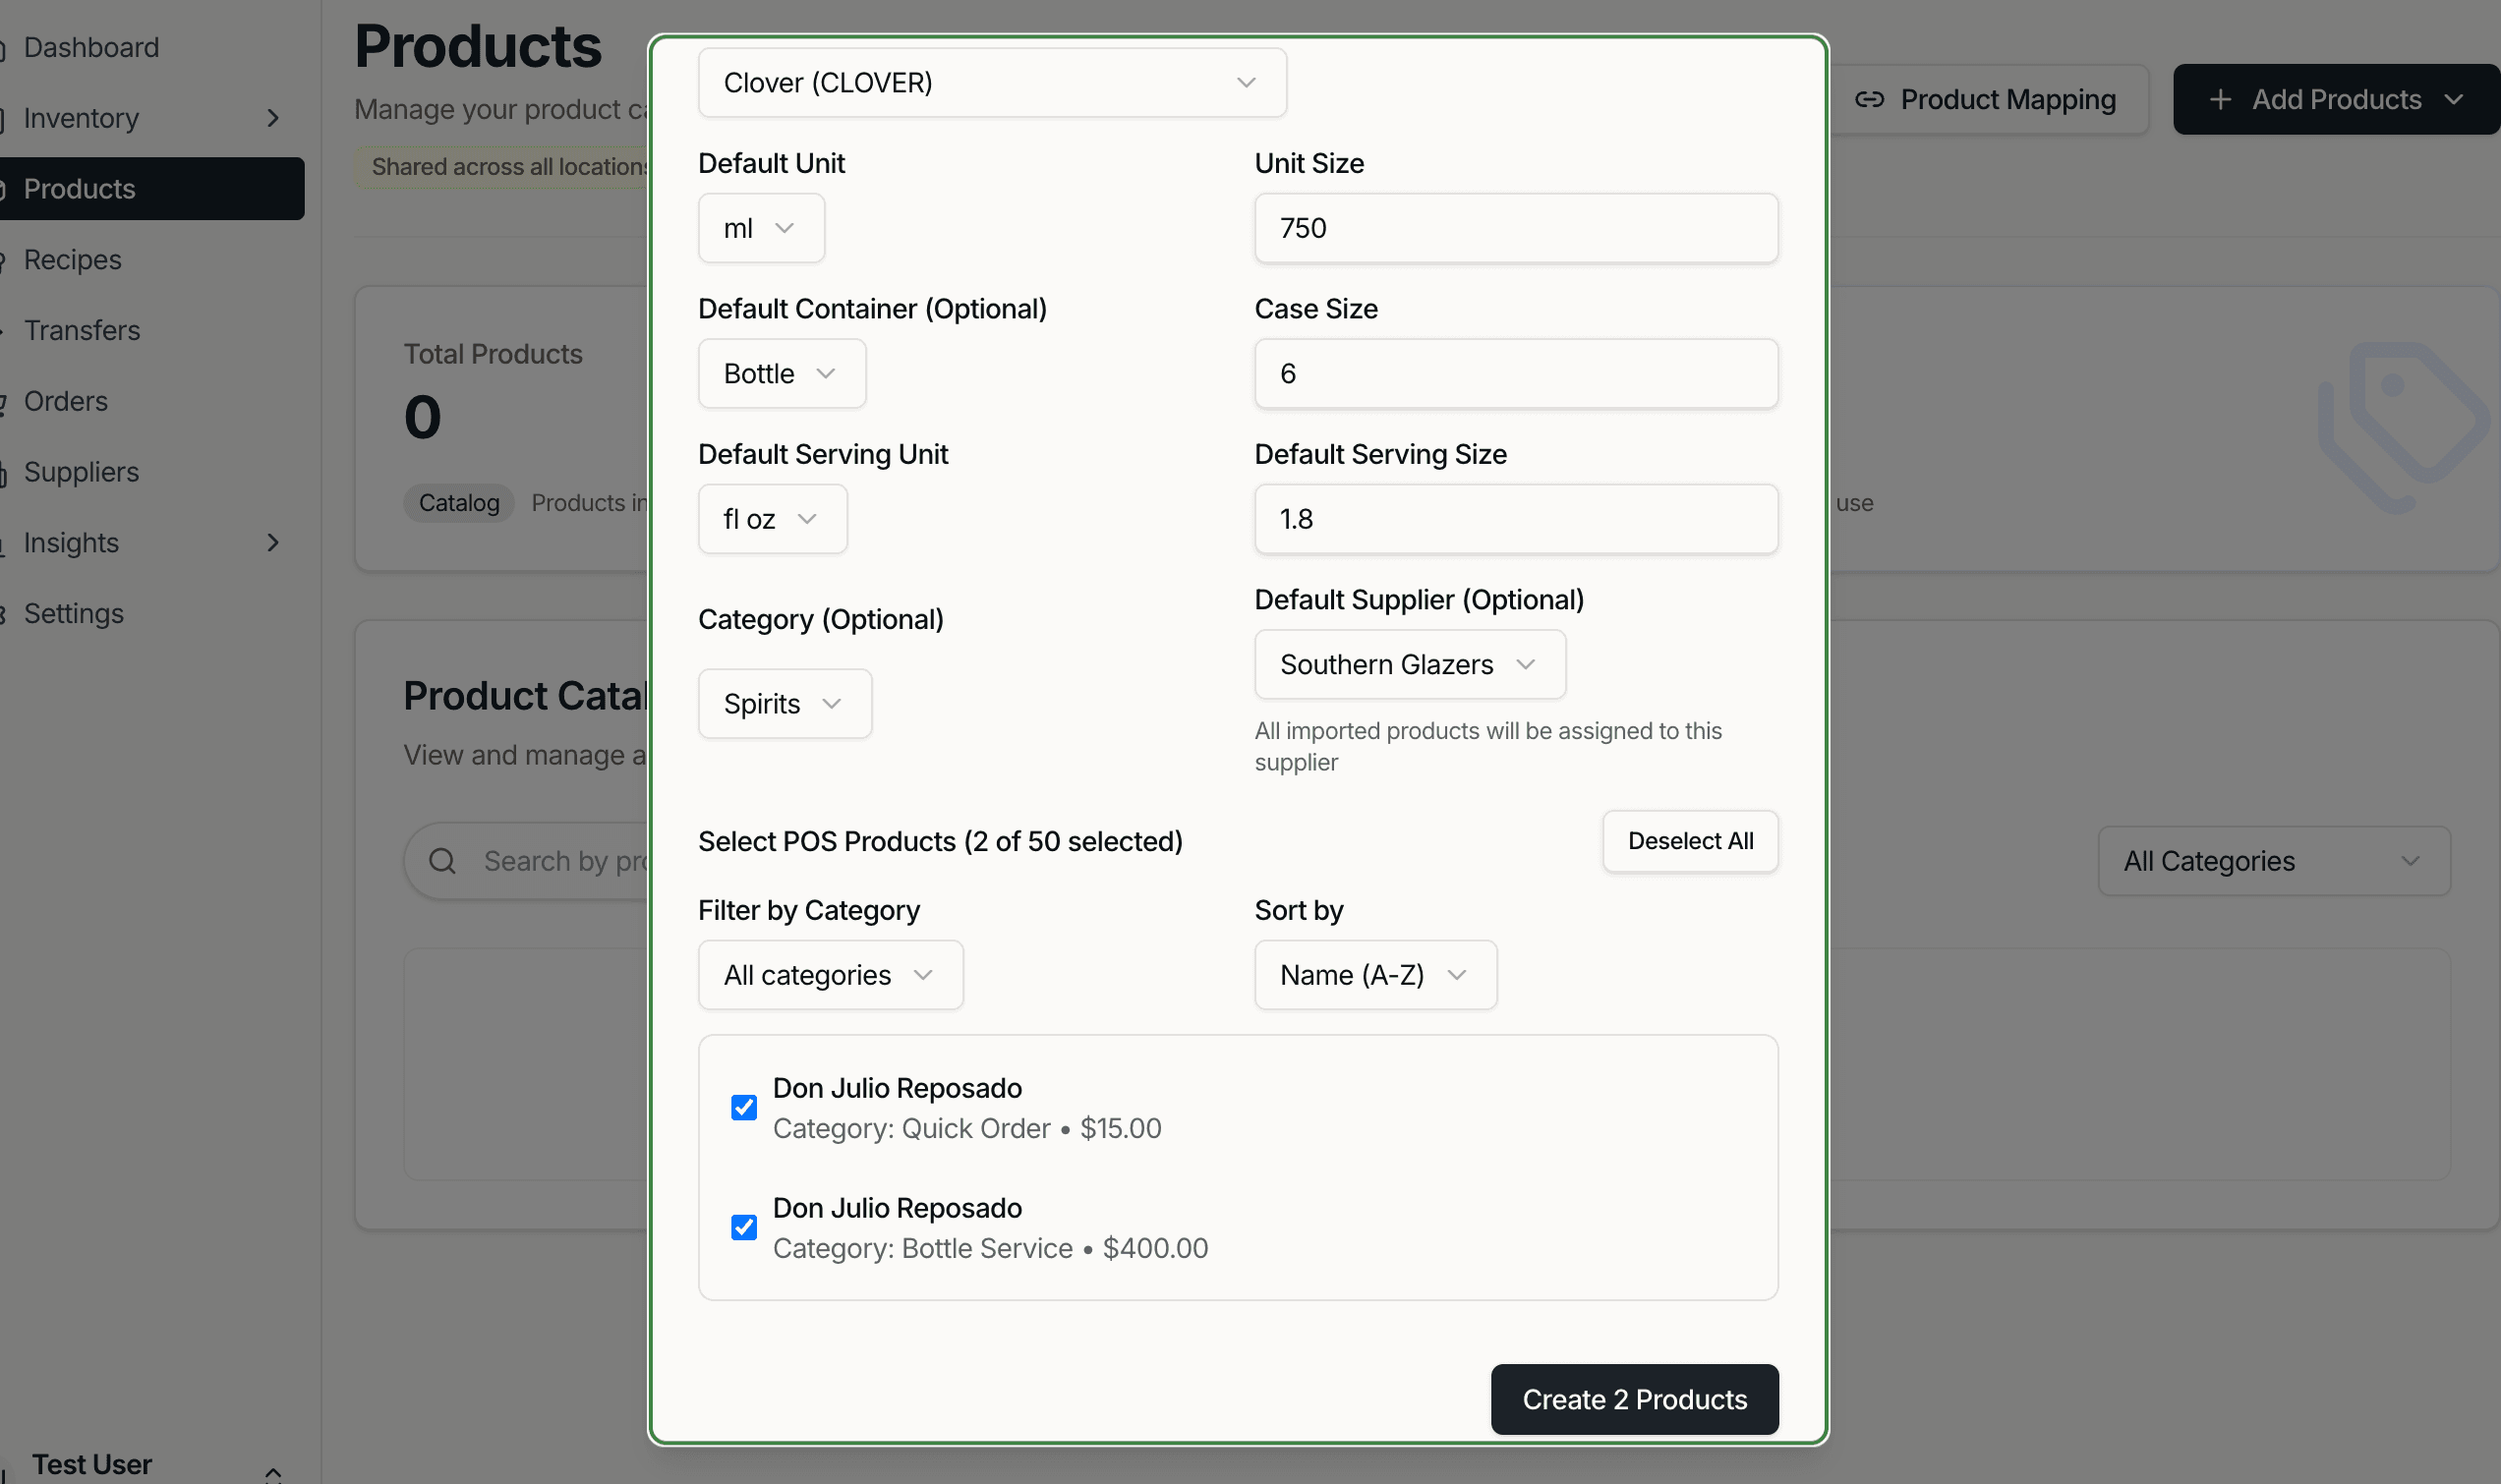
Import from POS
If you've already connected a POS integration, select Import from POS to pull in your menu items automatically.
5. Set Up Storage Areas
Storage areas represent specific places within a location where products are kept — like "Main Bar", "Back Bar", "Walk-In Cooler", or "Dry Storage".
Storage areas are created when you start a new inventory count. Navigate to Inventory > Counts and click New Count. In the count setup screen, you'll add storage areas that define how you walk through your inventory.
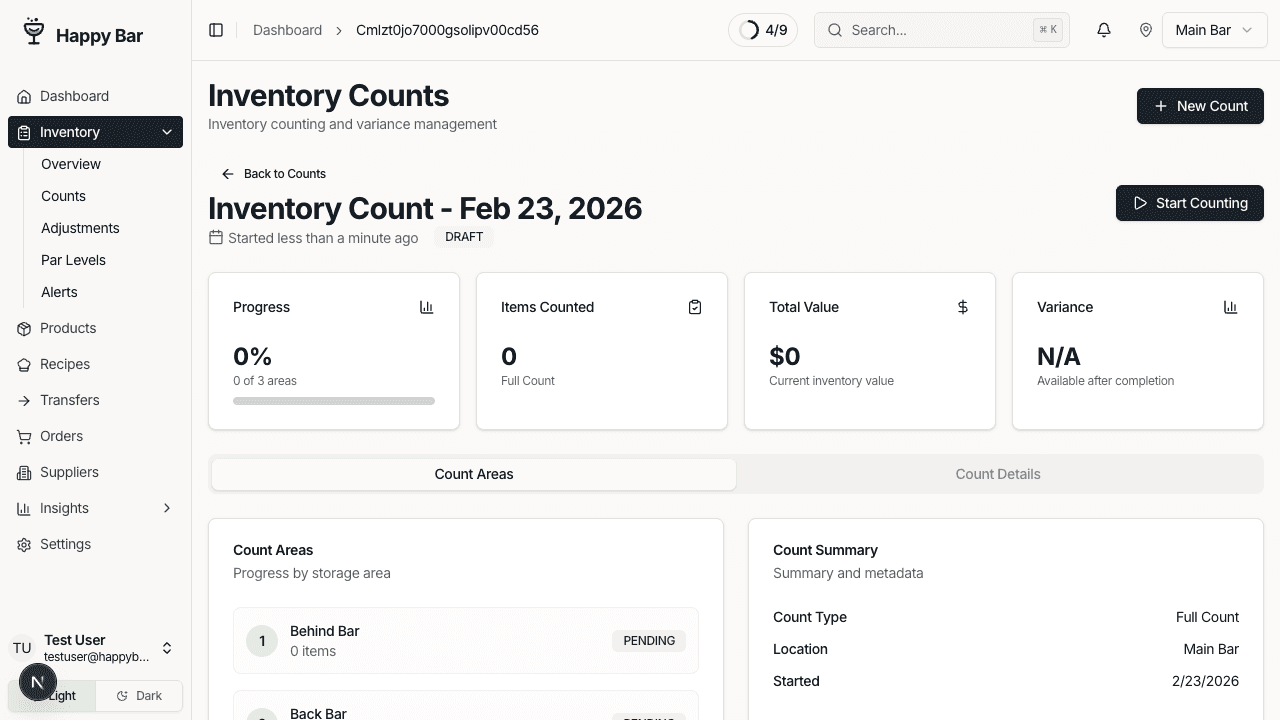
6. Take Your First Count
Navigate to Inventory > Counts and click New Count.
- Name your count — it auto-populates with today's date
- Select the count type:
- Full Count — complete inventory of all items
- Spot Check — quick count of select items
- Cycle Count — rotating count of different areas
- Add storage areas — add the areas you want to count in order
- Click Create Count, then Start Counting
You'll count products area by area. For each item:
- Enter the number of full units
- Enter a partial unit amount in 0.1 increments (e.g., 0.5 for a half-full bottle)
- Add notes for anything unusual
After counting all areas, review your results and approve the count.
7. Review Your Dashboard
After completing your first count, head back to the Dashboard to see:
- Inventory value across locations
- Stock levels and alerts
- Recent count results and variance data
- Order activity and pending actions
You're all set! Continue to the Clover Integration guide to connect your POS, or jump to Inventory Counting for a deeper dive into the counting process.